Target File Bundles
Target file bundles (or simply Bundles) allow you to export sets of strings or files in the formats you select, regardless of the original file format. By default, you can choose from the following three formats: XLIFF, Android XML, and iOS Strings. You can add more target file formats by installing respective applications from the Crowdin Store.
You can work with bundles in several ways:
- Manage bundles manually via the project’s Downloads section.
- Connect a VCS integration in Target file bundles mode.
- Manage bundles using CDN Distributions.
- Manage bundles using Crowdin CLI and API.
The most common use cases include:
- Cross-Platform Export: Upload a single source file (e.g., Android XML), translate it, and export translations for multiple platforms (e.g., iOS Strings for iOS, JSON for Web) using bundles.
- Unified Source Management: Upload a unified spreadsheet (e.g., XLSX or CSV) with source strings for all platforms. Use bundles to export separate files for each platform by filtering strings based on labels or paths.
- Design Tools Integration: Send strings from design tools (Figma, Sketch, Adobe XD) directly to Crowdin Enterprise and export translations in development-ready formats using bundles.
- Offline Translation: Export specific string sets in XLIFF format for offline translation and upload finished translations back to Crowdin Enterprise.
To work with bundles manually, you can configure and download them from the Downloads section of your project.
To configure a bundle, follow these steps:
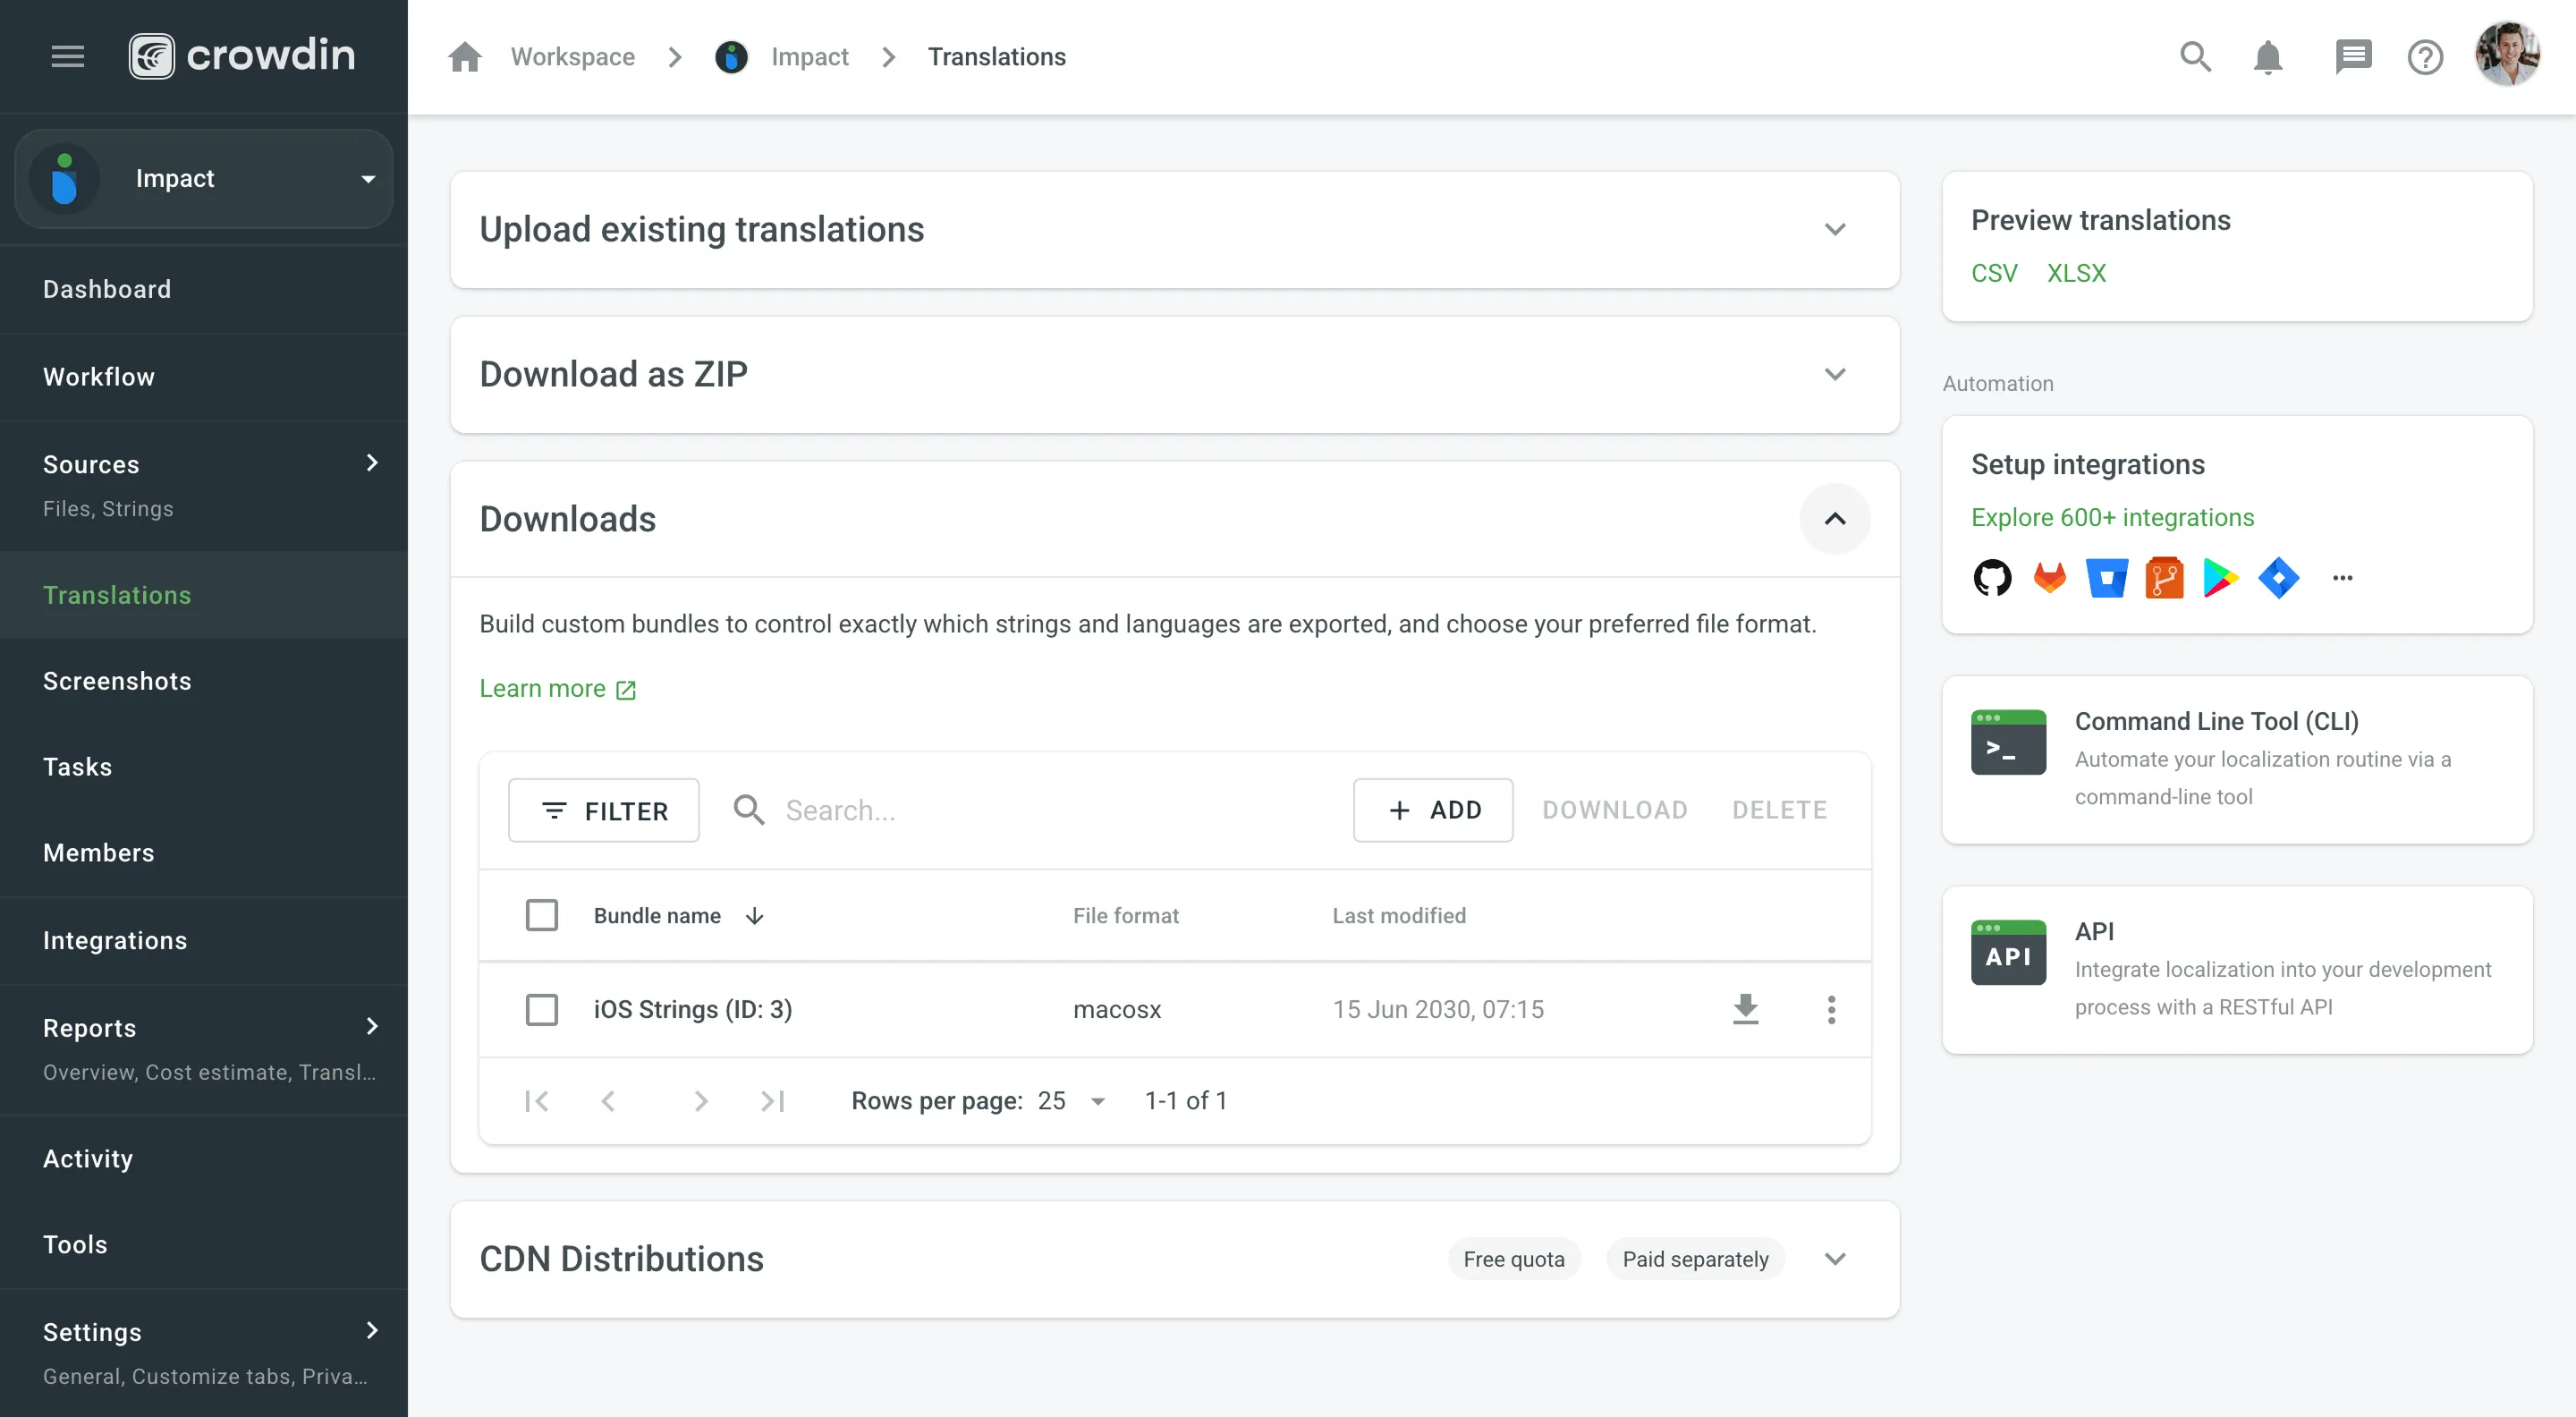
- Open your project and select Translations on the left sidebar.
- Expand the Downloads section and click Add.
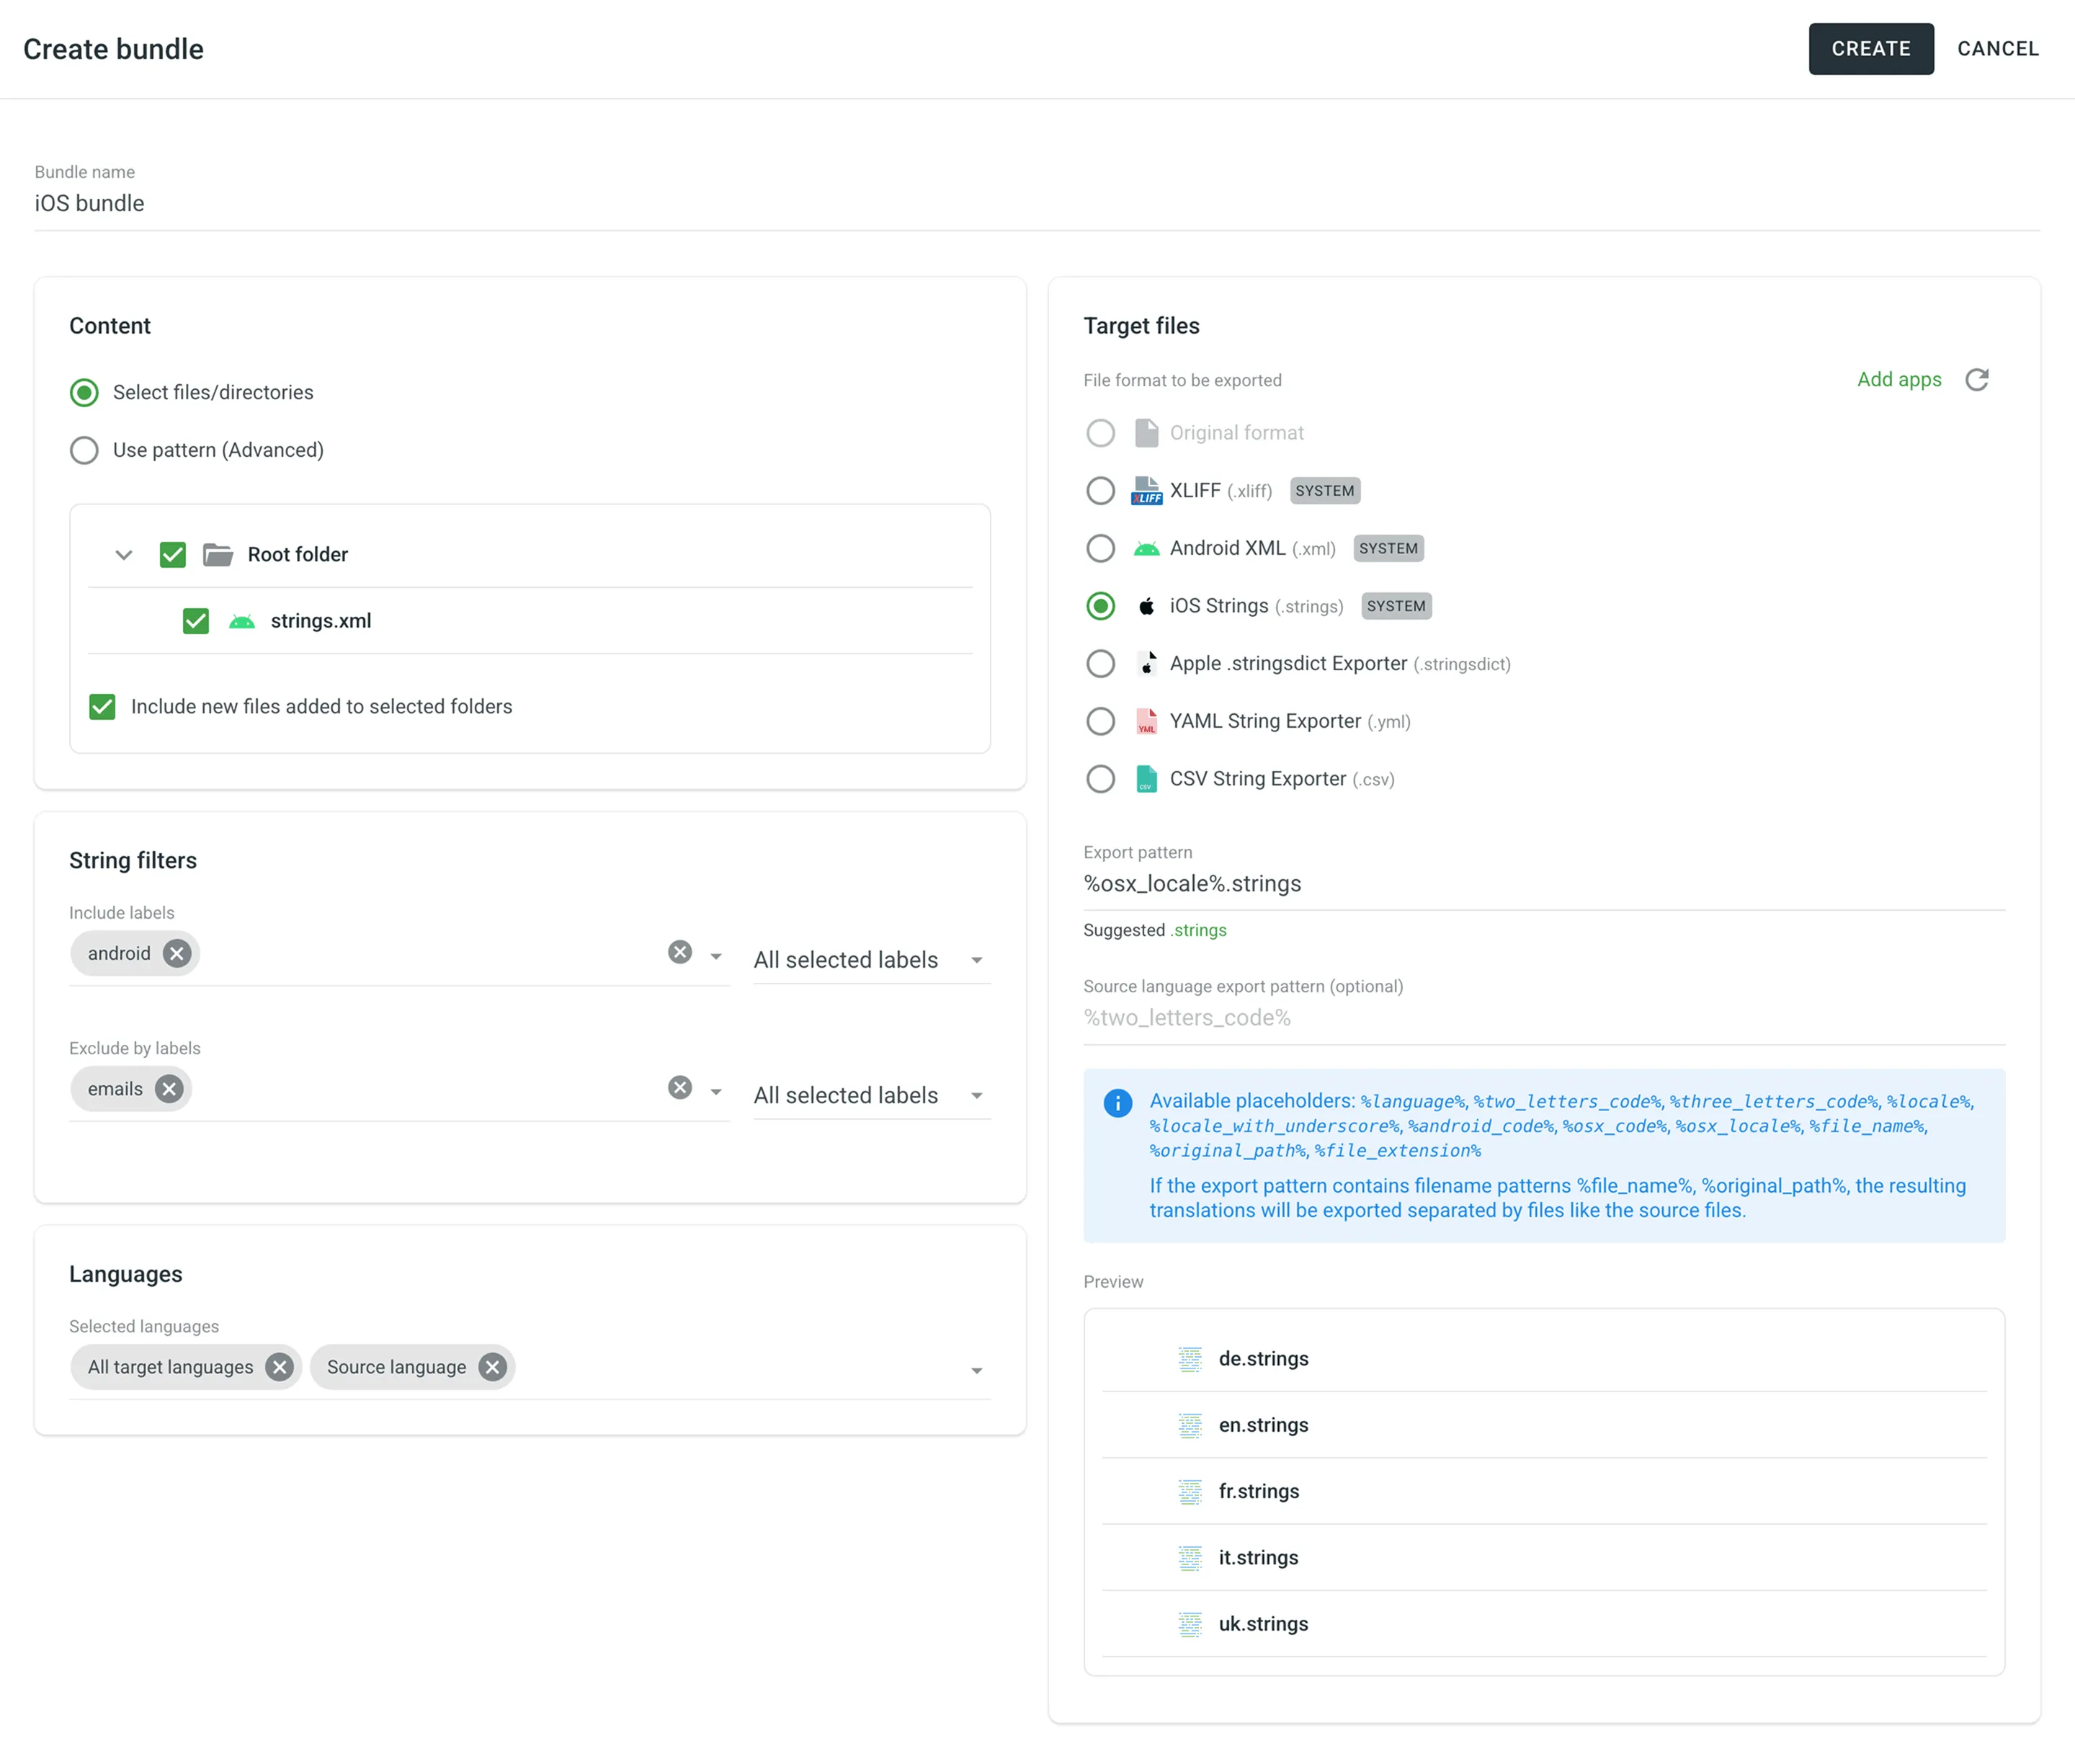
- In the Create bundle dialog, enter a Bundle name.
- Configure the Content (Left Panel):
- Select files/directories: Browse your project tree. You can select specific files, folders, or the Root folder to include the entire project. Select Include new files added to selected folders to automatically include future files.
- Use pattern (Advanced): Define a Source files path pattern (e.g.,
*.xml) to dynamically include files. You can also specify Ignore files or folders to exclude specific items.
- (Optional) Set String filters:
- Include labels: Only export strings containing specific labels.
- Exclude labels: Skip strings containing specific labels.
- You can adjust the logic for multiple labels (e.g., All selected labels (AND) vs Any selected label (OR)).
- Configure Languages:
- All target languages: Selected by default. This option is dynamic and will automatically include any new languages added to the project in the future.
- Source language: Select to include the source language content in the bundle.
- In-context pseudo-language: Select to export your files with the metadata required for the In-Context integration.
- Specific languages: Remove the All target languages chip to select specific languages manually.
- Configure Target files (Right Panel):
- File format: Select the format you want to export. You can select Original format to export files as-is, or choose a target format like iOS Strings, XLIFF, etc.
- Add more formats: To add other target formats, install the respective applications from the Crowdin Store.
- (Optional) Format configuration: Some formats (e.g., XLIFF, Android XML) support advanced options configured in Settings > Parser configuration.
- Export pattern:
- For Original format: This field is optional. Leave it empty to use the default export pattern defined in your file settings. Enter a pattern to override the default path or name.
- For other formats: This field is required.
- Single file per language: Use language placeholders (e.g.,
%two_letters_code%.xliff) to create one translation file for each language. - Multi-file export: Use placeholders like
%file_name%or%original_path%to export translations separated by files, matching the source file structure.
- Single file per language: Use language placeholders (e.g.,
- (Optional) Set a Source language export pattern.
- Check the Preview panel to ensure the structure looks correct.
- Click Create.
- Open your project and select Download on the left sidebar..
- Expand the Downloads section and click Add.
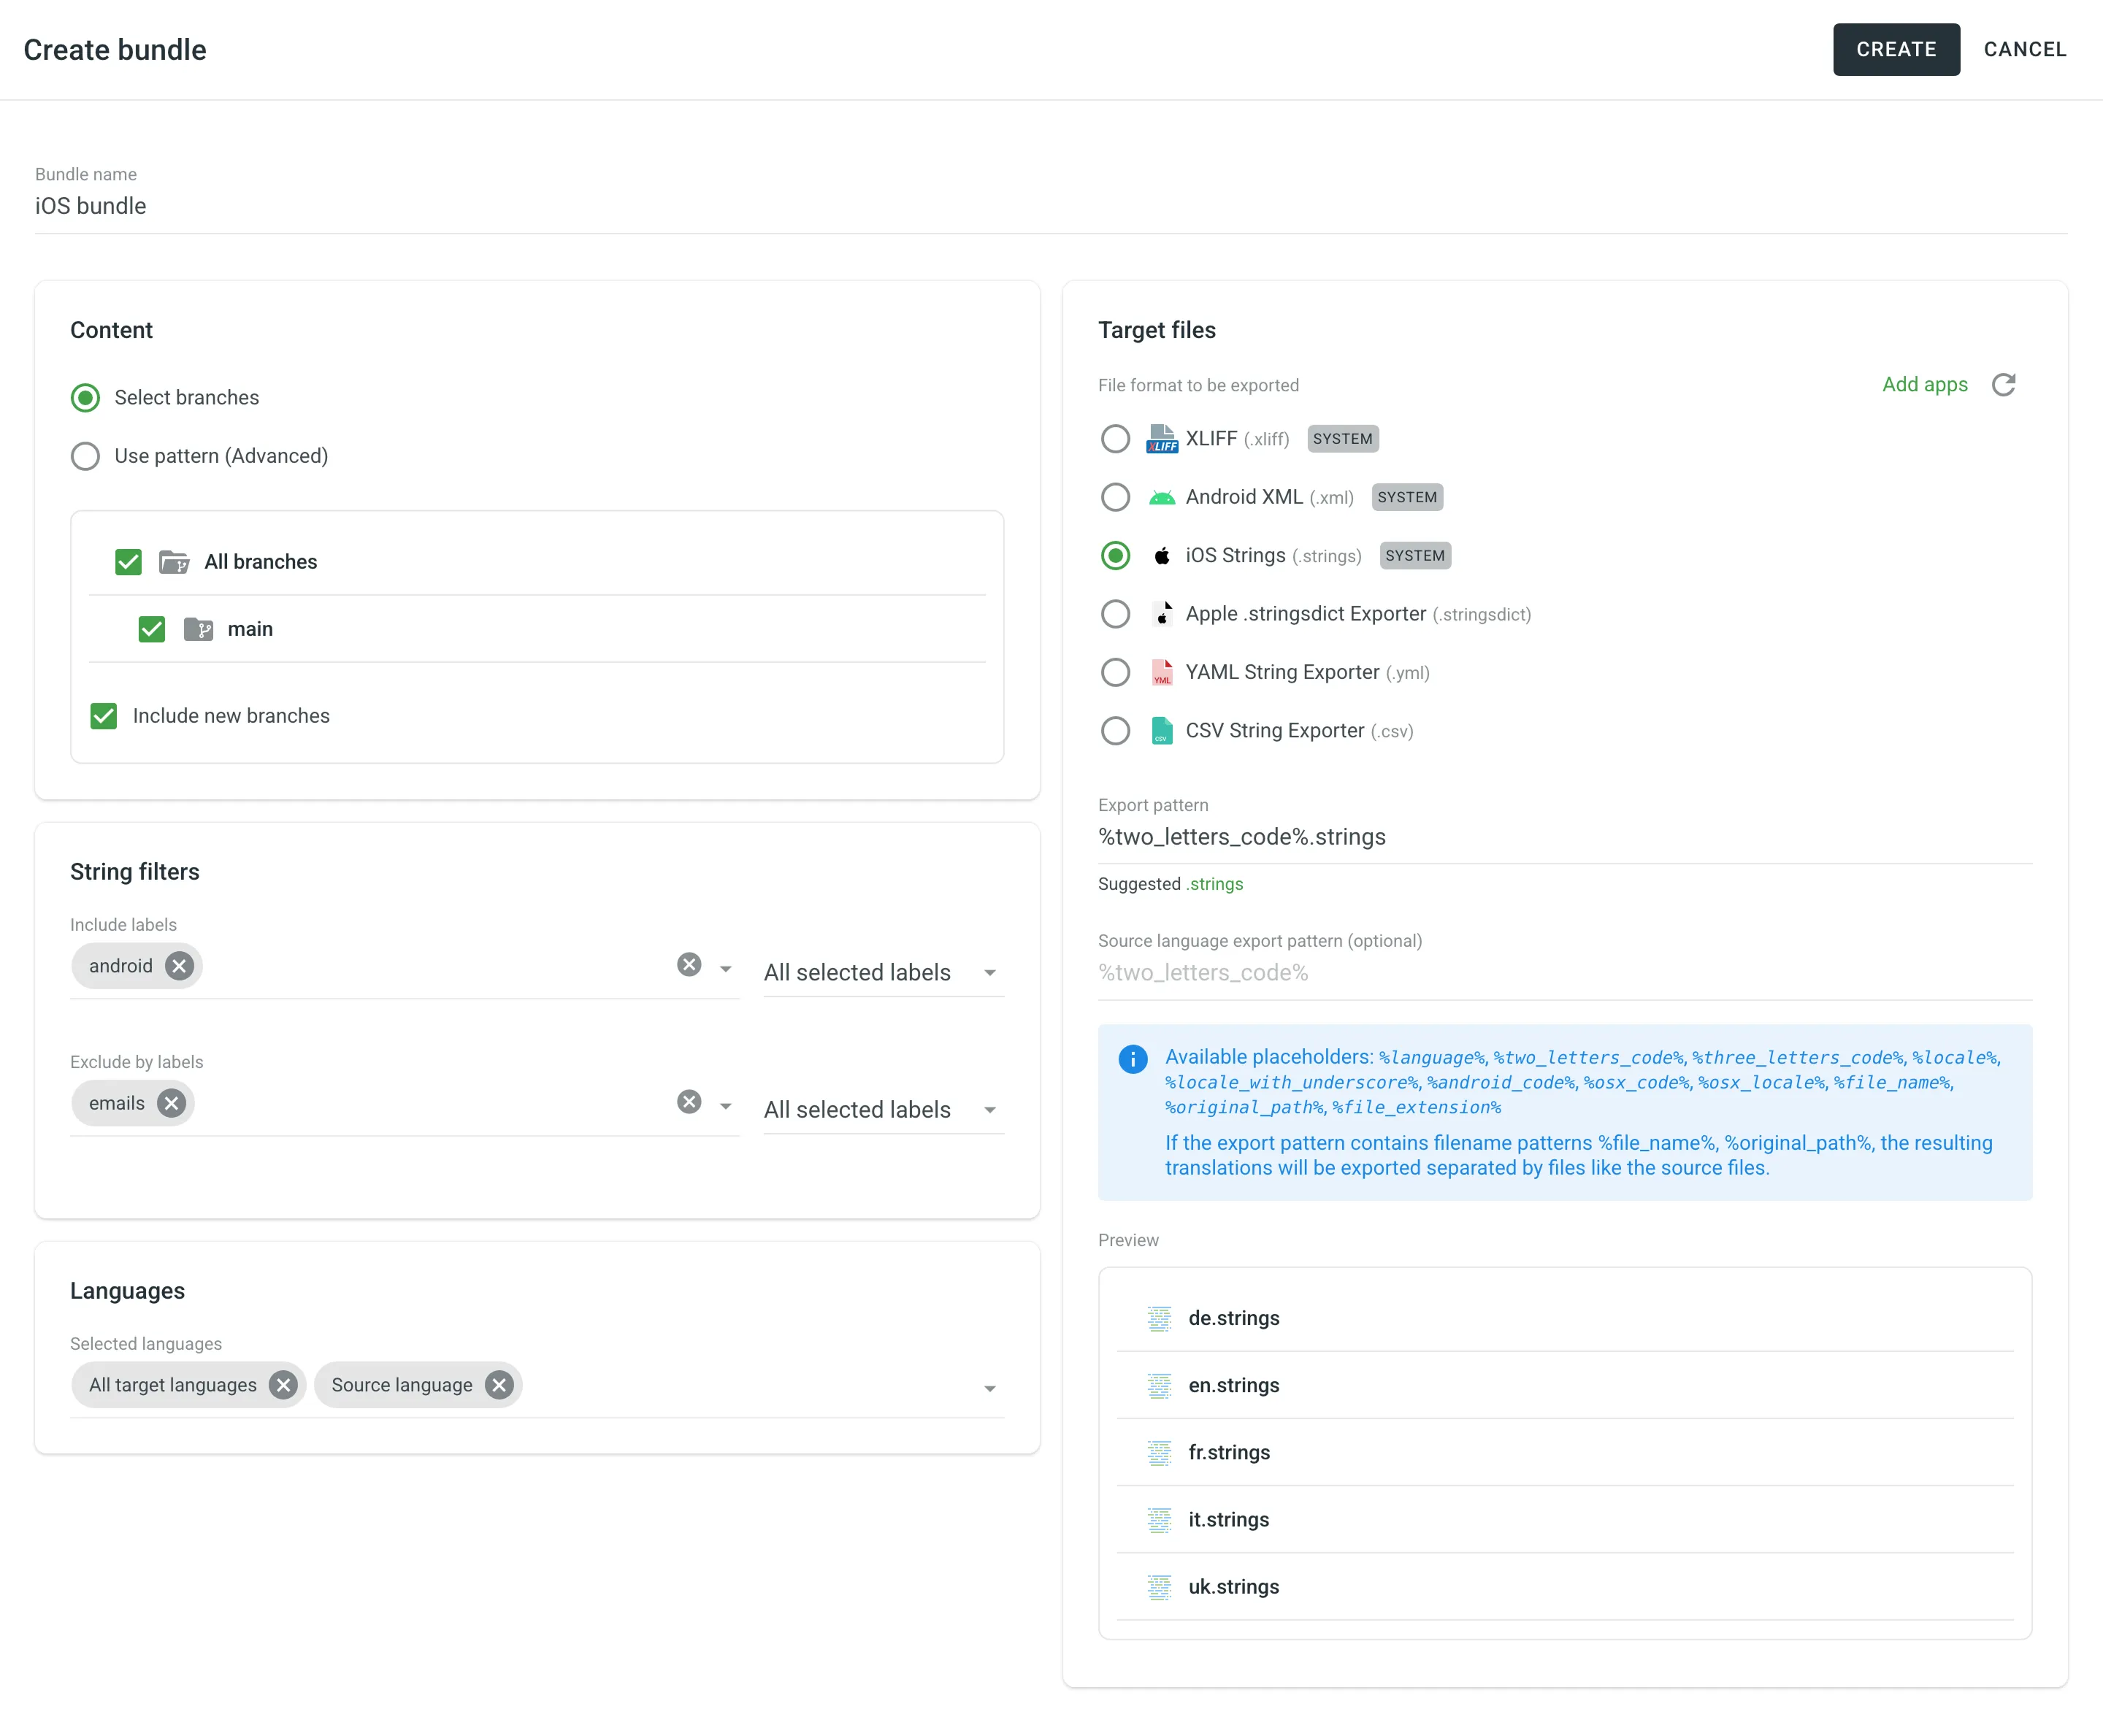
- In the Create bundle dialog, enter a Bundle name.
- Configure the Content (Left Panel):
- Select branches: Select specific source branches to include. Select Include new branches to automatically include future branches.
- Use pattern (Advanced): Define a Source branches path pattern (e.g.,
main,feat/*) to dynamically include branches.
- (Optional) Set String filters:
- Include labels: Only export strings containing specific labels.
- Exclude labels: Skip strings containing specific labels.
- You can adjust the logic for multiple labels (e.g., All selected labels (AND) vs Any selected label (OR)). Read more about Labels.
- Configure Languages:
- All target languages: Selected by default. This option is dynamic and will automatically include any new languages added to the project in the future.
- Source language: Select to include the source language content in the bundle.
- In-context pseudo-language: Select to export your files with the metadata required for the In-Context integration.
- Specific languages: Remove the All target languages chip to select specific languages manually.
- Configure Target files (Right Panel):
- File format: Select the format you want to export (e.g., Android XML, iOS Strings).
- Add more formats: To add other target formats, install the respective applications from the Crowdin Store.
- (Optional) Format configuration: Some formats (e.g., XLIFF, Android XML) support advanced options configured in Settings > Parser configuration.
- Export pattern: Define the resulting file name using language placeholders (e.g.,
%two_letters_code%.strings). This will create one file per language. - (Optional) Set a Source language export pattern.
- Check the Preview panel to ensure the structure looks correct.
- Click Create.
Some file formats (e.g., XLIFF, Android XML) have additional configuration options, such as Copy source to empty target or Convert placeholders.
You can manage these settings globally for the project in the Parser configuration.
To configure these options, follow these steps:
- Open your project and go to Settings > Parser configuration.
- Locate the format marked with the Exporter badge (e.g., Android XML or XLIFF). These are the specific formats used for bundle generation.
- Click next to the format you want to configure and select Edit. Alternatively, just click on the needed format.
- Adjust the file format exporter settings by selecting the needed options.
- Click Save.
By default, all bundles are displayed in the Downloads section. To find a specific bundle, you can use the Search bundles field.
To filter the list of bundles, click Filters and use the available options:
- Format: Filter by file format (All, Original format, or specific target formats like macosx, xml, etc.).
- Last modified: Filter by modification date (All, Today, Yesterday, Last 7 days, Last 30 days, This month, Last month, Custom Range).
To sort bundles, click the column header you want to sort by:
- Bundle name
- Format
- Last modified
Click once to sort in ascending order and click again to sort in descending order.
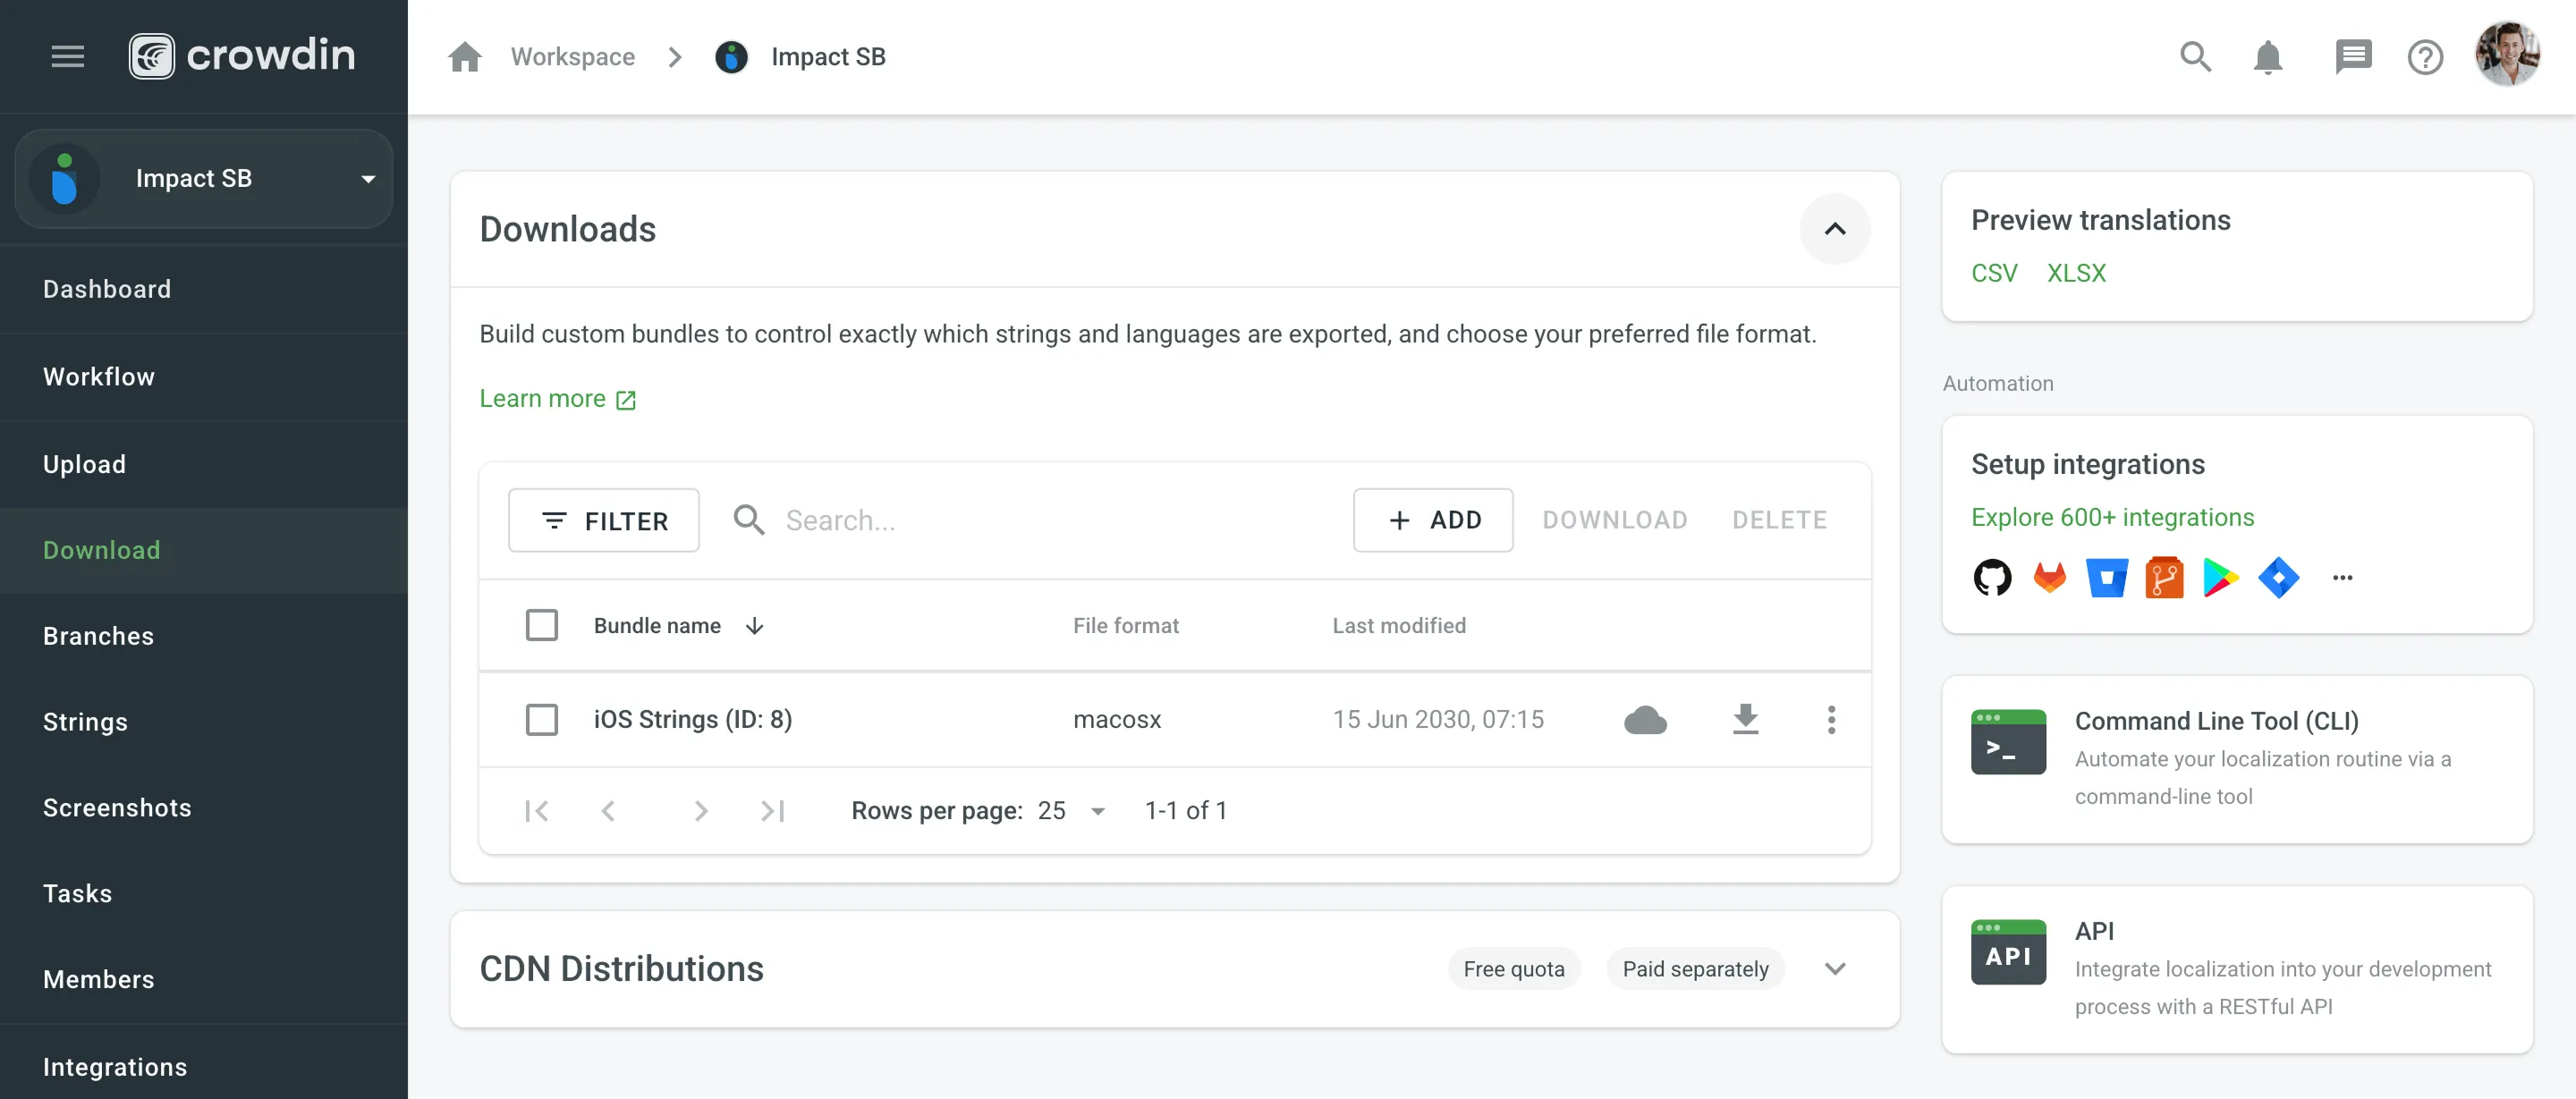
If a bundle is used in one or more CDN Distributions, a cloud icon will appear next to its name. Click this icon to automatically navigate to the CDN Distributions section with a filter applied to show only the distributions containing that bundle.
To download bundles, follow these steps:
- Open your project and select Translations on the left sidebar.
- Expand the Downloads section.
- (Optional) Use the search or filters to locate the bundles you need.
- Download the bundles using one of the following methods:
- Single bundle: Click Download next to the specific bundle.
- Multiple bundles: Select the checkboxes next to the bundles you want to download, then click Download in the upper-right corner of the list.
- Open your project and select Download on the left sidebar.
- Expand the Downloads section.
- (Optional) Use the search or filters to locate the bundles you need.
- Download the bundles using one of the following methods:
- Single bundle: Click Download next to the specific bundle.
- Multiple bundles: Select the checkboxes next to the bundles you want to download, then click Download in the upper-right corner of the list.
The system will build and download a ZIP archive containing folders for each selected language with the translation files in your chosen format.
To edit a bundle, follow these steps:
- Open your project and select Translations on the left sidebar.
- Expand the Downloads section.
- Click next to the bundle and select Edit. Alternatively, just double-click on the needed bundle.
- Make your changes in the configuration dialog and click Save.
- Open your project and select Download on the left sidebar.
- Expand the Downloads section.
- Click next to the bundle and select Edit. Alternatively, just double-click on the needed bundle.
- Make your changes in the configuration dialog and click Save.
To delete bundles, follow these steps:
- Open your project and select Translations on the left sidebar.
- Expand the Downloads section.
- Delete the bundles using one of the following methods:
- Single bundle: Click next to the bundle and select Delete.
- Multiple bundles: Select the checkboxes next to the bundles you want to delete, then click Delete in the upper-right corner of the list.
- Confirm the deletion in the confirmation dialog.
- Open your project and select Download on the left sidebar.
- Expand the Downloads section.
- Delete the bundles using one of the following methods:
- Single bundle: Click next to the bundle and select Delete.
- Multiple bundles: Select the checkboxes next to the bundles you want to delete, then click Delete in the upper-right corner of the list.
- Confirm the deletion in the confirmation dialog.
In file-based projects, VCS integrations allow you to work with bundles using Target file bundles mode.
To configure a VCS integration in Target file bundles mode, follow these steps:
- Select Target file bundles mode when setting up your VCS integration and authorize the connection.
- Select the repository and branches where you want to send translations.
- Click to configure the selected branch.
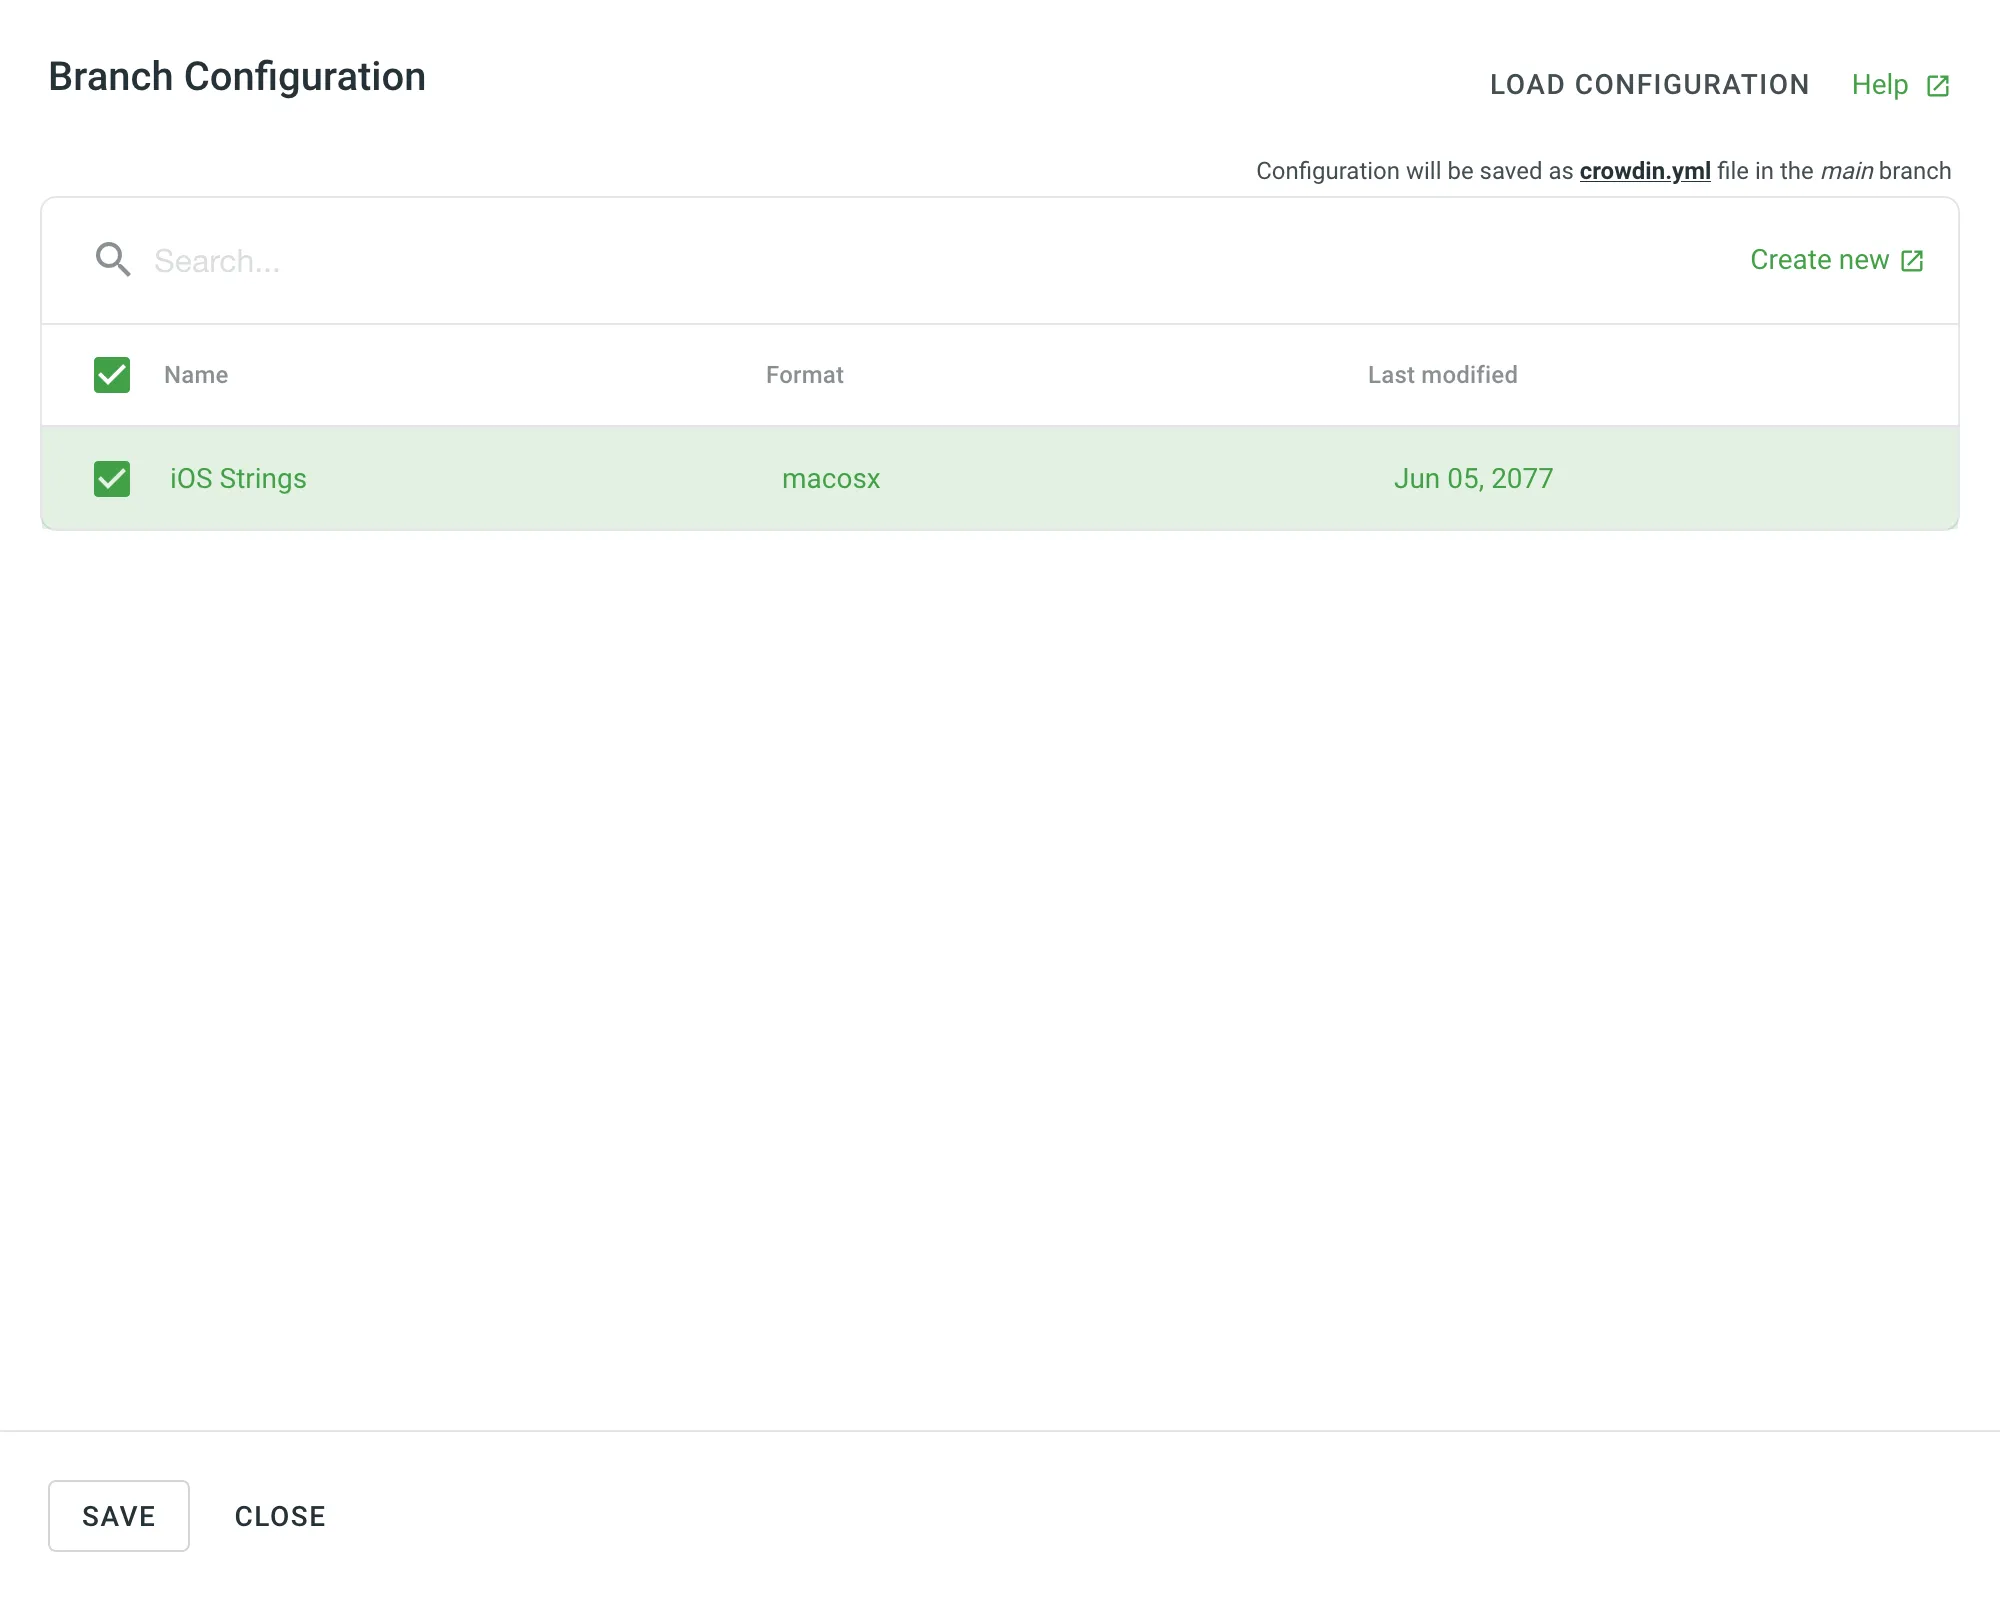
- In the Branch Configuration dialog, enter the preferred name for your configuration file or keep the default. Click Continue.
- Select the bundles you want to sync from the list. You can use the Search bundles field to find specific ones, or click Create new to set up a new bundle.
- Click Save in the Branch Configuration dialog.
- Click Save in the main integration dialog to complete the VCS integration setup.
Read more about configuring VCS integrations online.
In both file-based and string-based projects, CDN Distributions allow you to deliver translated content to your application via a Content Delivery Network (CDN). Distributions work by using bundles to package and serve your files.
You can also export translations using bundles when working with Crowdin CLI and API.